
Table of Contents
How to Set Up a Robot Vacuum for Hard Floors
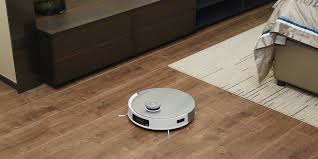
Setting up a robot vacuum for hard floors setup correctly can make a big difference in cleaning performance. Whether you have tile, hardwood, or laminate flooring, proper configuration ensures better efficiency, longer battery life, and more consistent results.
Many users skip the setup process and use default settings, but optimizing your robot vacuum for hard floors helps prevent streaks, missed spots, and unnecessary wear on your device.
Why Proper Setup Matters
A robot vacuum for hard floors setup is different from carpet cleaning. Hard surfaces require less suction but better navigation and consistent coverage.
If the settings are too strong, the vacuum may scatter debris instead of collecting it. If the suction is too low, it may leave dust behind. That’s why balancing power and movement is key.
Step-by-Step Setup Guide
Charge and Prepare the Device
Before using your robot vacuum, fully charge the battery. Place the charging dock on a flat surface with enough space around it for easy docking.
Connect to the Mobile App
Most modern robot vacuums come with a mobile app. Connecting your device allows you to control settings, schedule cleaning, and monitor performance.
Map Your Home
Mapping is one of the most important steps in robot vacuum for hard floors setup. Let the vacuum scan your home so it can create an efficient cleaning path.
This ensures all areas are covered without unnecessary repetition.
Best Settings for Hard Floors
To get the best results, adjust your robot vacuum settings based on your floor type.
- Use low to medium suction for hardwood floors to avoid damage
- Use medium suction for tile and laminate
- Enable edge cleaning for better corner coverage
These adjustments improve cleaning efficiency and protect your flooring.
Tips for Better Performance
For the best robot vacuum for hard floors setup, follow these simple tips:
- Remove small obstacles before cleaning
- Keep cords and rugs out of the way
- Clean the brushes regularly
- Empty the dustbin frequently
These small steps can significantly improve performance and extend the lifespan of your device.
Common Mistakes to Avoid
One of the biggest mistakes is using high suction on delicate surfaces like hardwood. This can cause unnecessary strain on the motor and reduce battery life.
Another mistake is skipping the mapping process. Without proper navigation, your robot vacuum may clean randomly and miss important areas.
Final Thoughts
A proper robot vacuum for hard floors setup ensures efficient cleaning and better long-term performance. By adjusting settings, using smart mapping, and maintaining your device, you can keep your floors clean with minimal effort.
Advanced Optimization Tips
To get the most out of your robot vacuum for hard floors setup, consider adjusting advanced settings available in the mobile app. Many models allow you to create no-go zones, schedule cleaning times, and customize cleaning intensity for specific rooms.
Using scheduled cleaning ensures your floors stay consistently clean without manual effort. You can also divide your home into zones and prioritize high-traffic areas like kitchens and hallways.
Additionally, updating your robot vacuum’s firmware regularly helps improve navigation and performance. Manufacturers often release updates that enhance cleaning efficiency and fix bugs.
FAQ
What is the best setting for robot vacuum on hard floors?
The best setting for a robot vacuum for hard floors setup is usually low to medium suction, which prevents debris from scattering and protects delicate surfaces.
Can robot vacuums damage hardwood floors?
No, most modern robot vacuums are safe for hardwood floors when used with the correct settings and soft brush systems.
How often should I clean hard floors with a robot vacuum?
For best results, a robot vacuum for hard floors setup should be used at least 3–5 times per week to maintain cleanliness and reduce dust buildup.